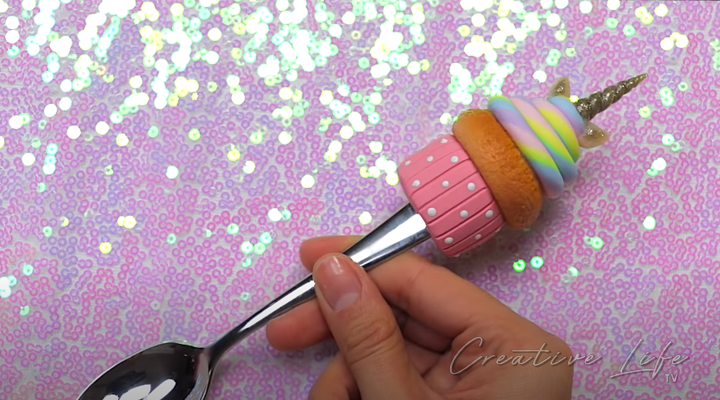

Learn how to make this polymer clay unicorn cupcake spoon, no mold needed! Perfect DIY gift for your kid’s birthday or friends who love cupcakes and unicorns! Comment below and tell us how your unicorn spoon turns out.
Materials:
- Polymer Clay
- Spoon
- Blade
- Spoolie Brush/Toothbrush
- Extruder
- Knife
- Ball-end Tool
STEP
1
cUPCAKE BASE

Roll the clay into cone shape and cut out the base.
STEP
2
cUPCAKE WRAPPER

Get a flat clay and use the rolled clay to make the cupcake wrapper.
STEP
3
WRAPPER DESIGNS

Gently make indentions onto the clay.
STEP
4
bLEND THE EDGES

Cut according to size and blend the edges to the base to make it seamless.
STEP
5
ATTACH IT!

Carefully push spoon onto the base.
STEP
6
clay mixing

Make a dome shape for the cupcake top. check to see if the size fits.
STEP
7
ADD TEXTURE

Add texture to the clay using the spoolie brush or toothebrush.
STEP
8
pastel shading

With soft pastel, shade the cupcake top.
STEP
9
attach the clay

Attach the clay using sculpey bake and bond.
STEP
10
baking time

Pre-bake for 5 minutes.
STEP
11
cupcake icing

Roll four different colored clays into long coils.
STEP
12
extruder

Put the combined clay onto the extruder and make the cupcake top icing.
STEP
13
glue the icing

Roll the clay and glue it on top of the cupcake.
STEP
14
unicorn horn

Make the unicorn horn by rolling out a thin coil and tapering the ends. Gently roll the ends together.
STEP
15
attach the horn

Glue the horn using bake and bond.
STEP
16
unicorn ears

Make the unicorn ears by making small triangle shape.
STEP
17
ear details

Use the ball-end tool to add details and attach it.
STEP
18
bake again!

Pre-bake for 5 minutes.
STEP
19
more details

Add more details to it.
STEP
20
bake bake bake!

Bake according to the package directions.
STEP
21
optional step

Add a gloss glaze and add dots to cupcake liner.
