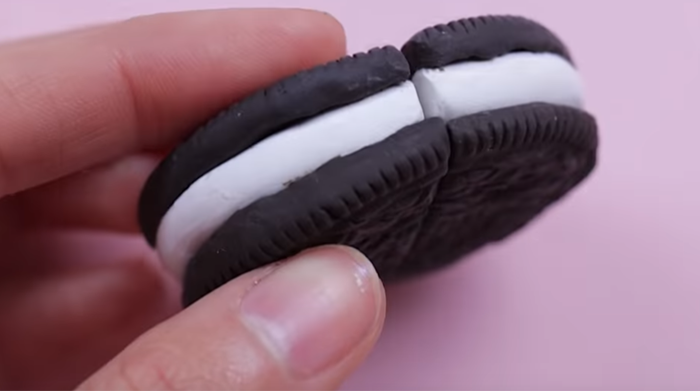
In this blog, we will show you how to make a Clay Oreo USB. This DIY Clay Oreo USB is must add for the back to school hacks list. Please follow the instructions carefully.
Materials:
-
Flash Drive
- 1 Oreo Cookie
- Putty
- Chocolate, Black, White Clay
- Knife/Cutter
STEP
1
Mold creation

First step, get an equal amount of putty and mix it thoroughly to create the mold that you need.
STEP
2
Molding

Then, gently press the mixed putty onto the top of the oreo to get the mold of the cookie.
STEP
3
Excess Removal

After that, get your knife and carefully remove the excess mold from the edge of the oreo cookie.
STEP
4
molded cookie

Once the putty was molded, gently remove the oreo from the putty.
STEP
5
chocolate oreo color clay

Time to make the “chocolate oreo color” clay. Prepare two clays: one chocolate-colored clay and one black.
STEP
6
clay mixing

Now, mix the chocolate-colored clay with a small amount of black clay together to reach the color of the cookie.
STEP
7
color matching

Get another oreo cookie and try to compare the mixed clay if the color matches with the oreo.
STEP
8
clay molding

Once you’re satisfied with the color, time to mold the clay onto the putty. Gently press the clay inside to get the shape of the cookie.
STEP
9
clay preparation

once the clay is thoroughly pressed and molded, gently remove the clay from the putty.
STEP
10
clay division

Once the clay is carefully removed, place the clay on the table. Get anything that can be used for cutting and cut the clay into half.
STEP
11
usb position

Now prepare your flash drive. position it in the place of the clay to achieve the look that you wanted.
STEP
12
oreo filling

Time to do the filling of the oreo. Use the white clay to do this.
STEP
13
add filling

Place the white clay in the edges of the clay oreo to make a circle shape.
STEP
14
cutting

Once done, cut the white clay into half just like the oreo clay.
STEP
15
filling the gaps

Get more white clay and start filling the gaps. do this until the flash drive is covered with the white clay.
STEP
16
blending edges

After filling the gaps, make sure that you blend the edges to achieve a smooth appearance of the oreo filling.
STEP
17
do the other cookie

Repeat the process on the other cookie. make sure the half part of the flash drive is fully covered with the white clay, and also everything is blended and has a smooth filling like the other cookie.
STEP
18
remove usb

If the filling is smoothly blended and all done, remove the flash drive from the clay fore the baking preparation.
STEP
19
baking

Start the oven and bake the clay according to the package direction.
STEP
20
glue

Time to put everything together. Get the flash drive and glue it back to the baked clay.
STEP
21
attaching everything

After putting the flash drive back, get the other half of the cookie. Glue the oreo top using bake and bond.
STEP
22
pressing

To make sure everything is in tuck together, gently press the oreo top for several seconds.
STEP
23
finished product

Bake the clay one last time according to the package directions. Ad now here you have it! The finished product. DIY Oreo USB


