

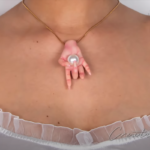
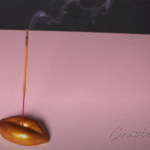
We show you just how to make your own polymer clay antler horn jewelry dish inspired by Anthropologie! Perfect DIY ring holder for your home or to gift to a friend. This Do it yourself jewelry stand puts a posh hippie look that shows off our rings and will impress your friends.
Materials:
- Clay
- Rolling Pin
- Coaster
- X-Acto Knife
- Foil
- Bake & Bond
- Sculpting tools
- Pastel or Paint
STEP
1
thin layer

Roll a thin layer of clay.
STEP
2
cut it out!

Place a coaster or a cookie cutter on the clay and cut it out.
STEP
3
cut the excess

Keep the clay on top of the coaster and cut the excess. Dont forget to soften the edges!
STEP
4
antler shape

Take aluminum foil and shape into an antler shape. Make 2 antlers.
STEP
5
cover it up

Warm up the clay in your hands then add the clay to the antlers until the foil is fully covered. Make sure to smooth the clay out.
STEP
6
attach the antlers

Attach the antlers to the tray using bake & bond. Blend it and add texture. Smooth the texture a little bit with your fingers.
STEP
7
antler texture

Add some texture to the antlers and smooth it out after.
STEP
8
flower petals

Take a new clay for the flower. Gently press a small amount of clay in your hands. this will serve as the petals of the flower.
STEP
9
assemble the flower

Make the center of the flower and attach the petals to it.
STEP
10
leaf shape

Take a new clay, shape it into a leaf and add score marks to it.
STEP
11
attach the flowers and leaves

Place the flowers and leaves to the antlers using the bake and bond.
STEP
12
loosen and baked!

Use the x-acto knife to loosen the bottom of the clay from the coaster and bake it according to the package directions.
STEP
13
release from coaster

Use an x-acto and gently cut the clay to release from coaster.
STEP
14
optional step

Color the bottom with pastel or paint and paint on gloss coat.

